
Reference material and notes for electronics workshop conducted for Westerville schools August 2019.
Outline
- A few orientation questions
- Overview of the three hardware platforms
- Setup and programming each platform, first pass
- Looking deeper at the electronics of these platforms
- Adding input/output hardware and libraries
- Problem-driven processes
- Additional resources
Hardware Platforms Notes
All three are excellent open platforms for learning physical computing but each has its own niche
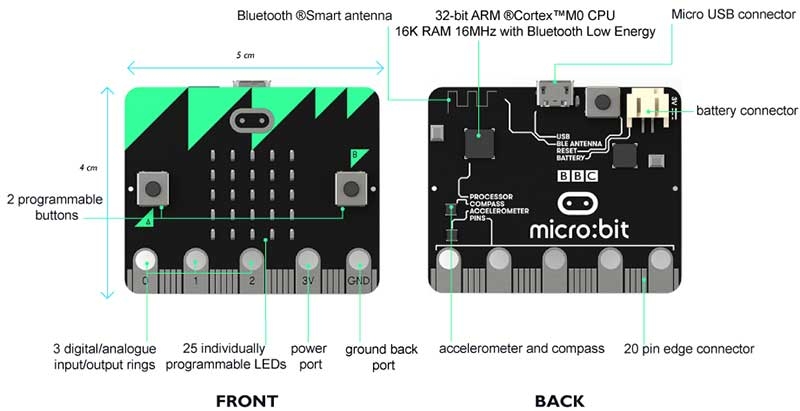
Microbit
- main product site
- developer site
- board components
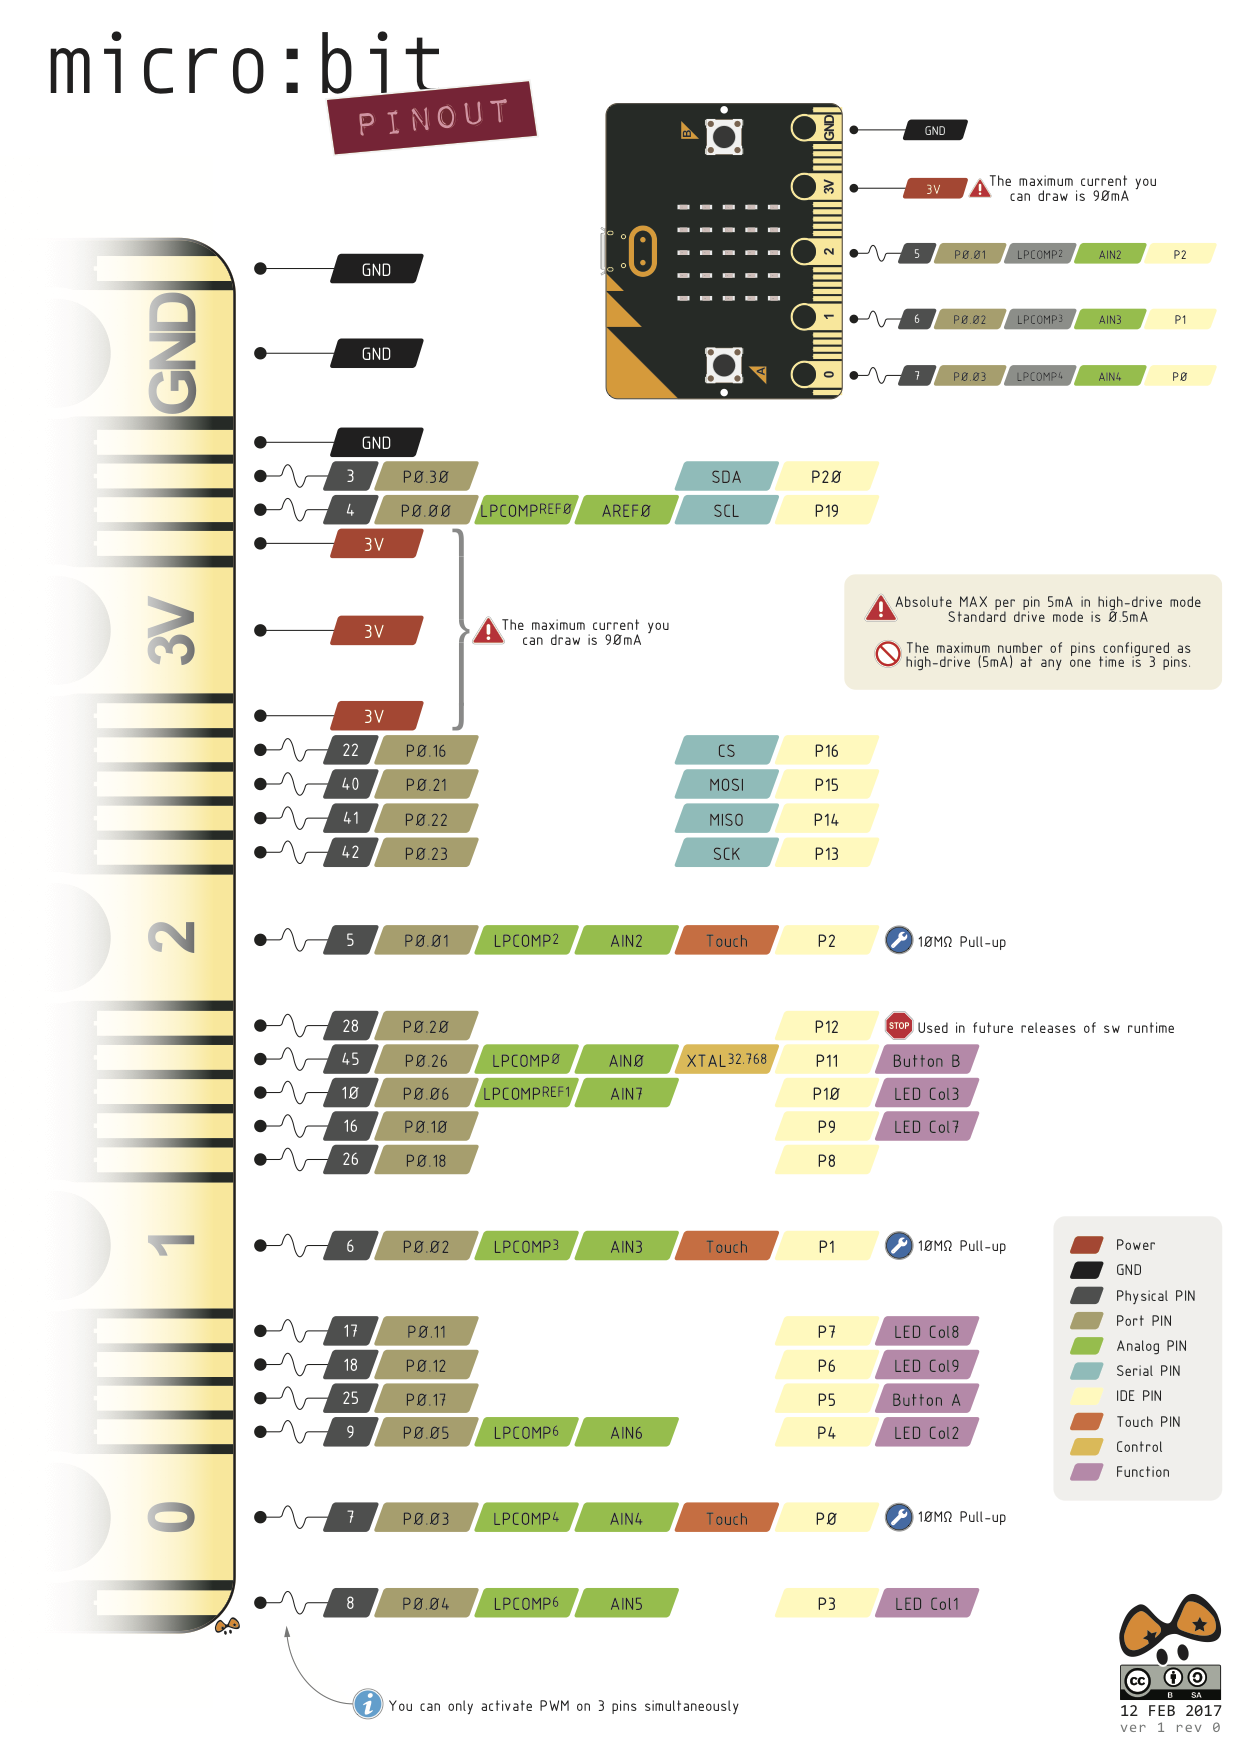
- pinout
- bluetooth app? pairing
- extensions
- going deeper: Micropython on Microbit, radio example
Pros:
- easiest to get started with, no drivers install, no software to install, no hardware setup
- on board accessories
- many educational examples at middle school level
Cons:
- poor expandability due to form factor and IO pins
- questionable Bluetooth compatibility
- single hardware platform
- uneven availability
- not 5v tolerant
- poor on board power output 5ma per pin, ~90ma total
Best for: middle school level, quick workshops, using just the board or with select accessories.
Arduino Uno / Mega
- What is Arduino?
- Main product site
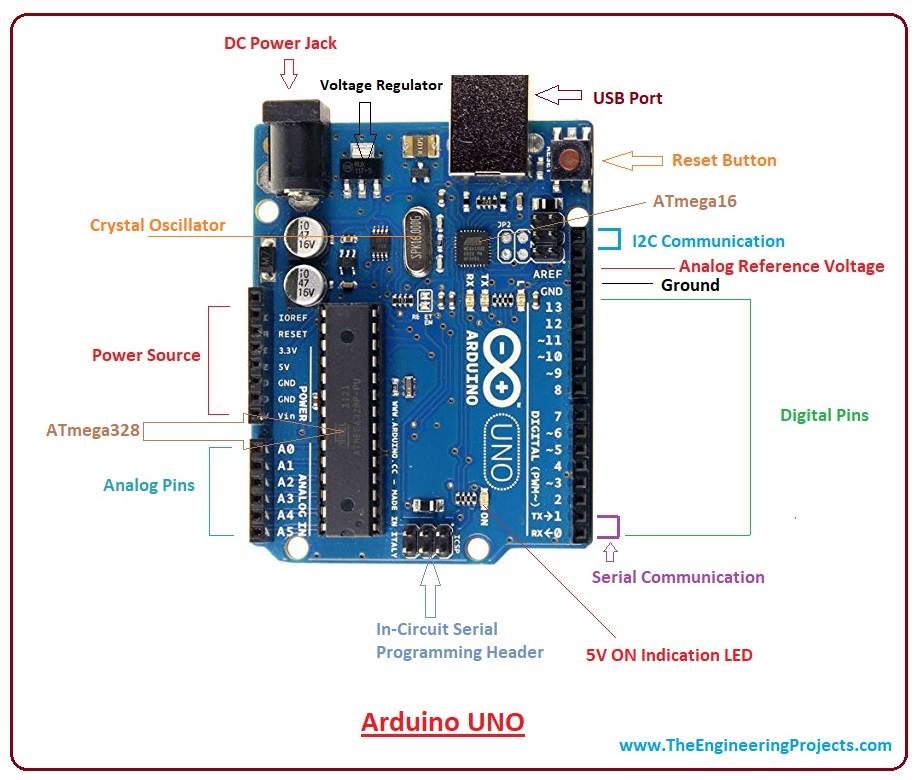
- Uno components
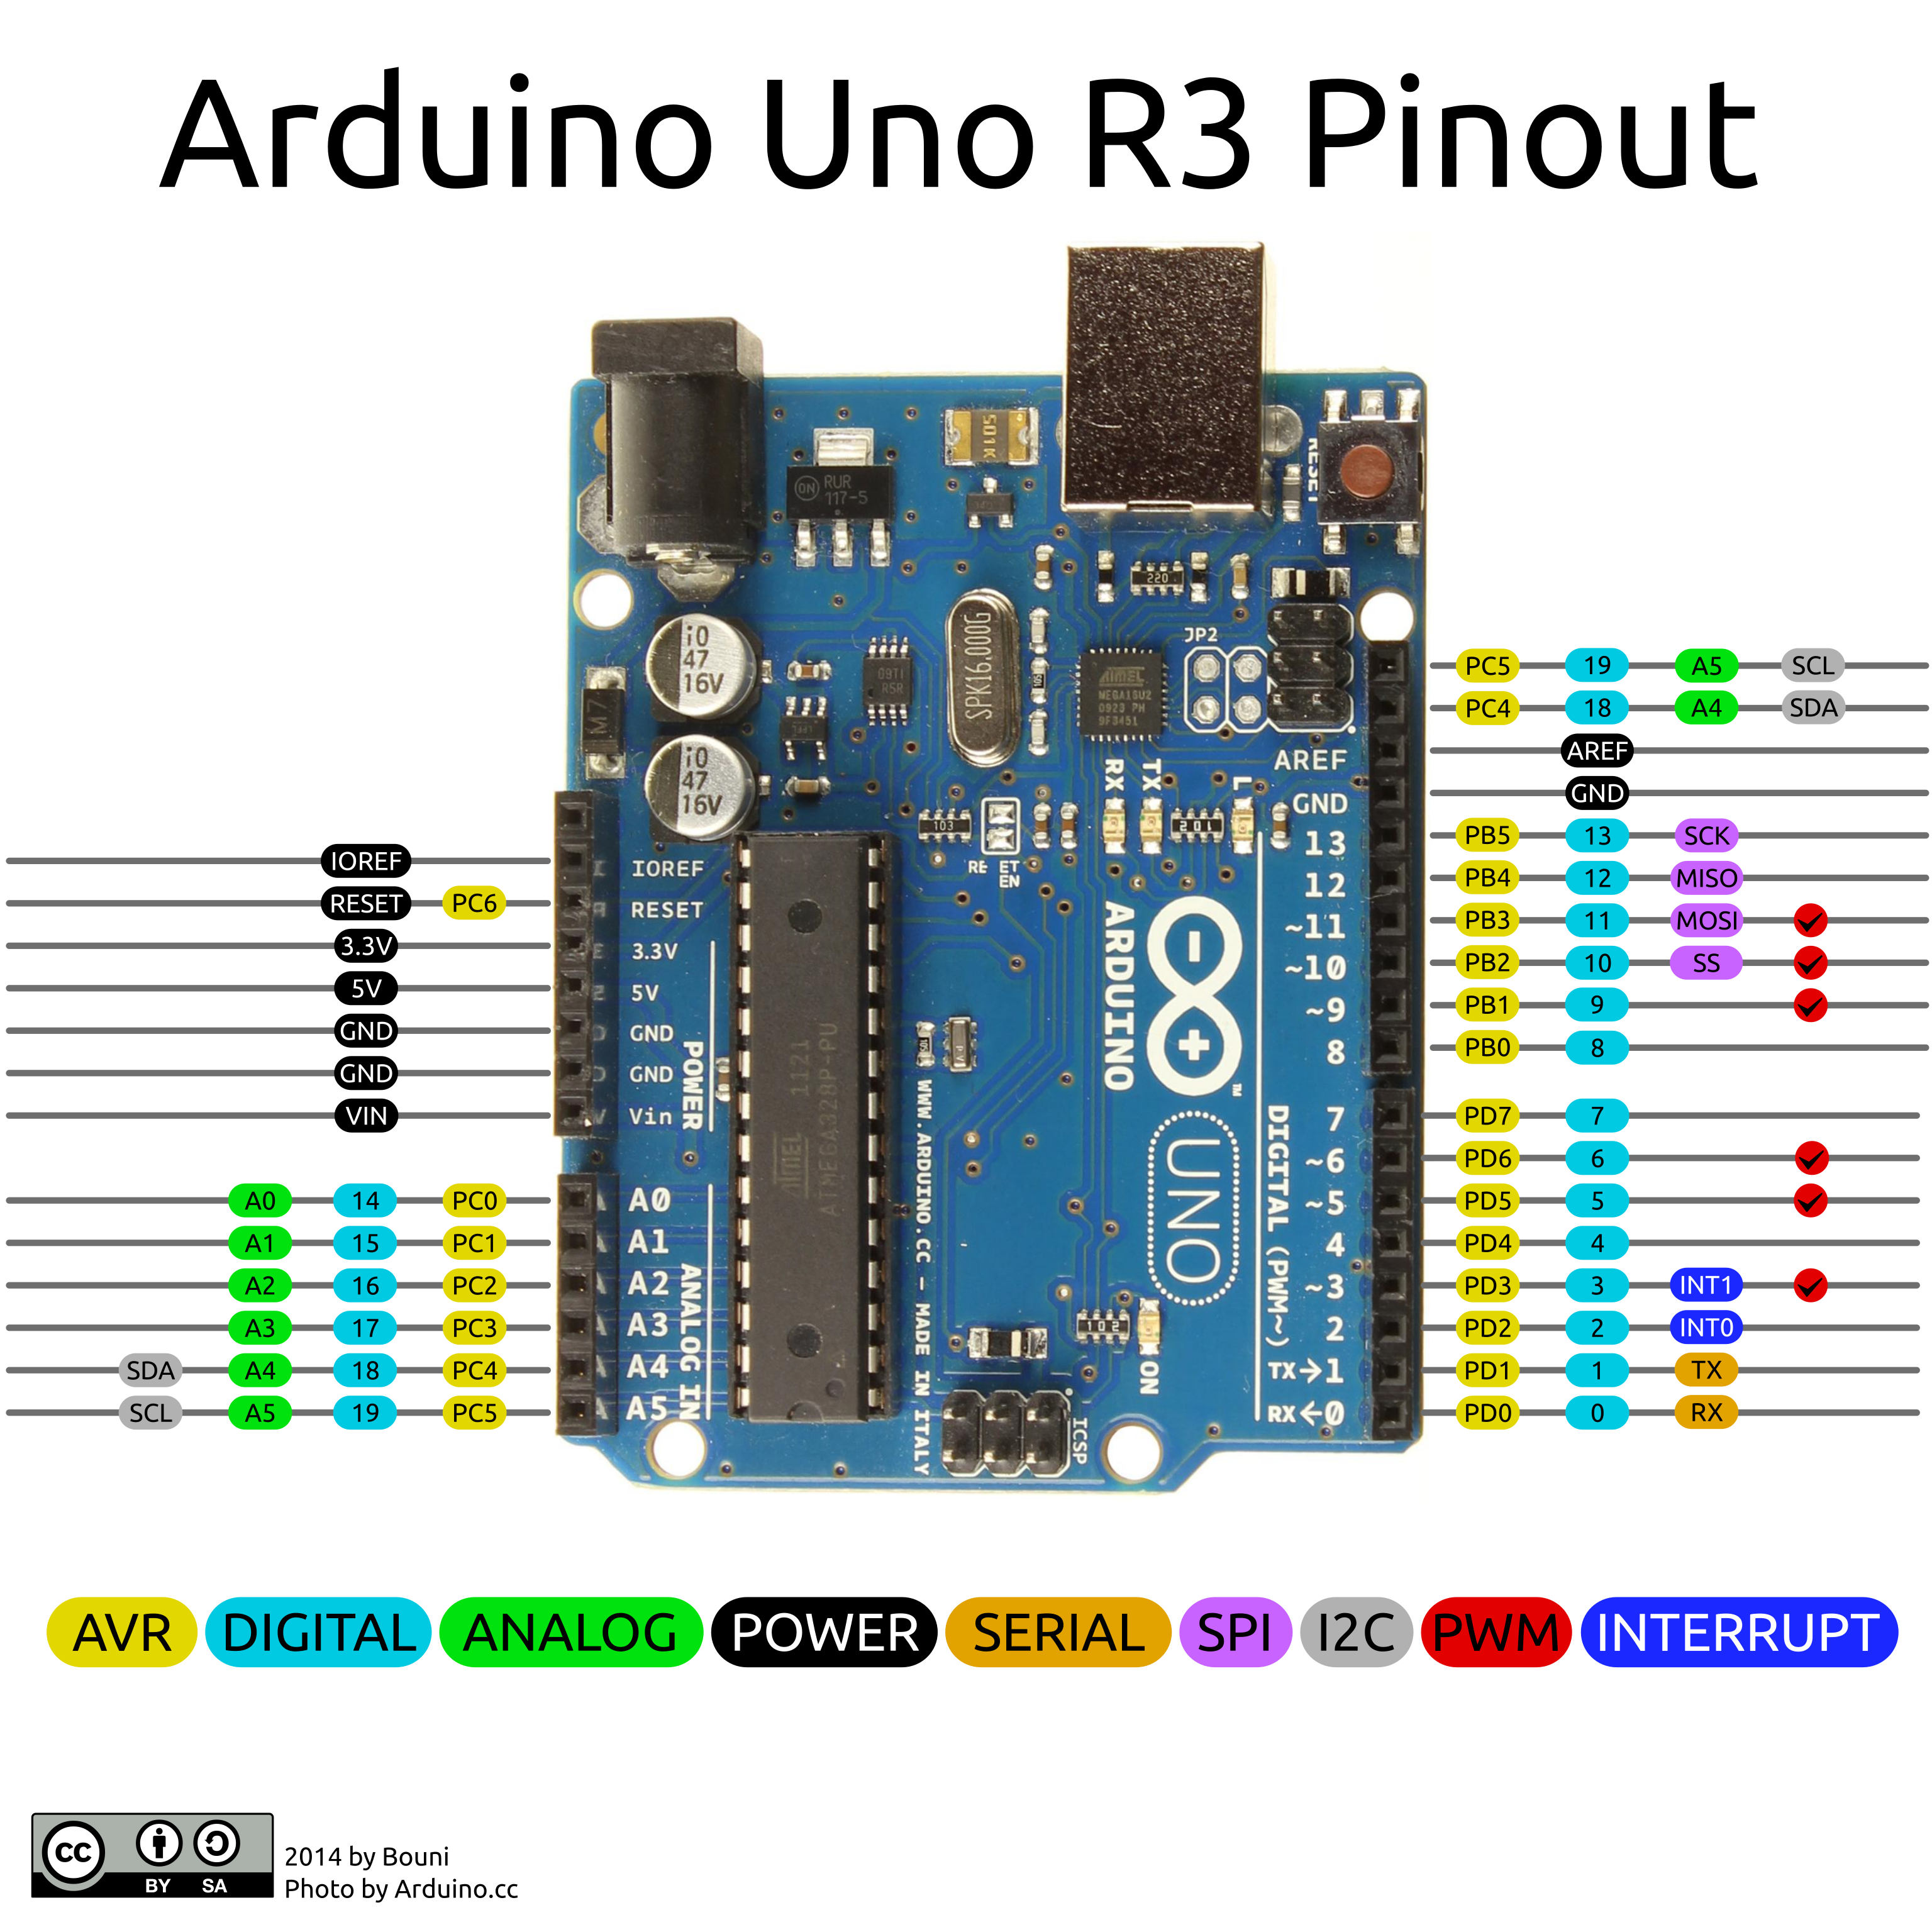
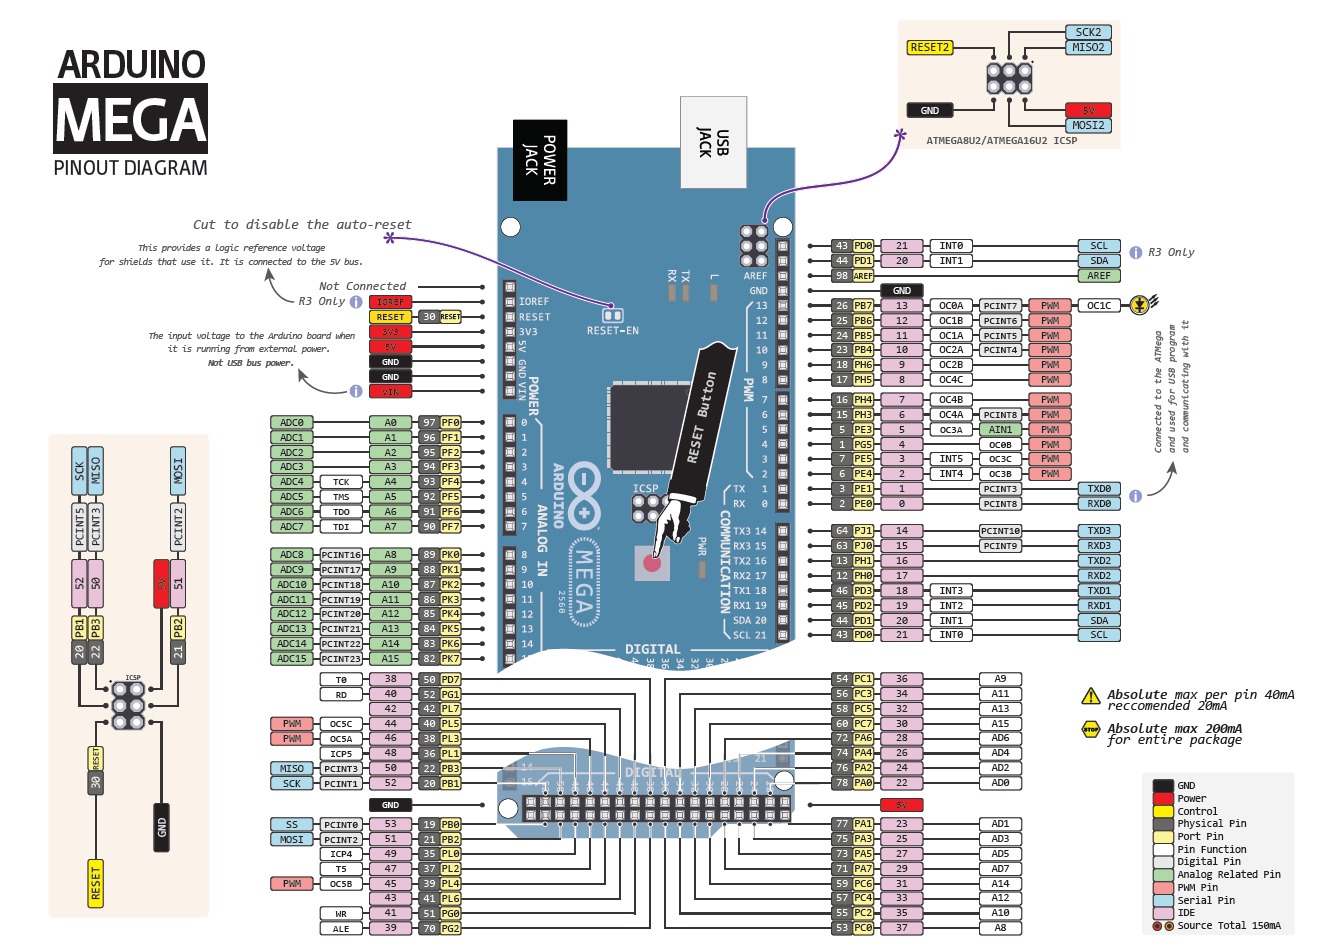
- Uno pinout, Mega pinout
Pros:
- most mature and widely supported with resources
- least expensive (generic)
- many hardware variations and alternative implementations
- conventional IO access and form factors
- 5v system throughout (in traditional form)
Cons:
- least capability
- no accessories on board
- no connectivity
- fading in popularity
Best for: all ages, moderate length to lifelong learning opportunities, open ended experimentation with physical computing that does not require connectivity or advance processing.
Raspberry Pi 3 B+
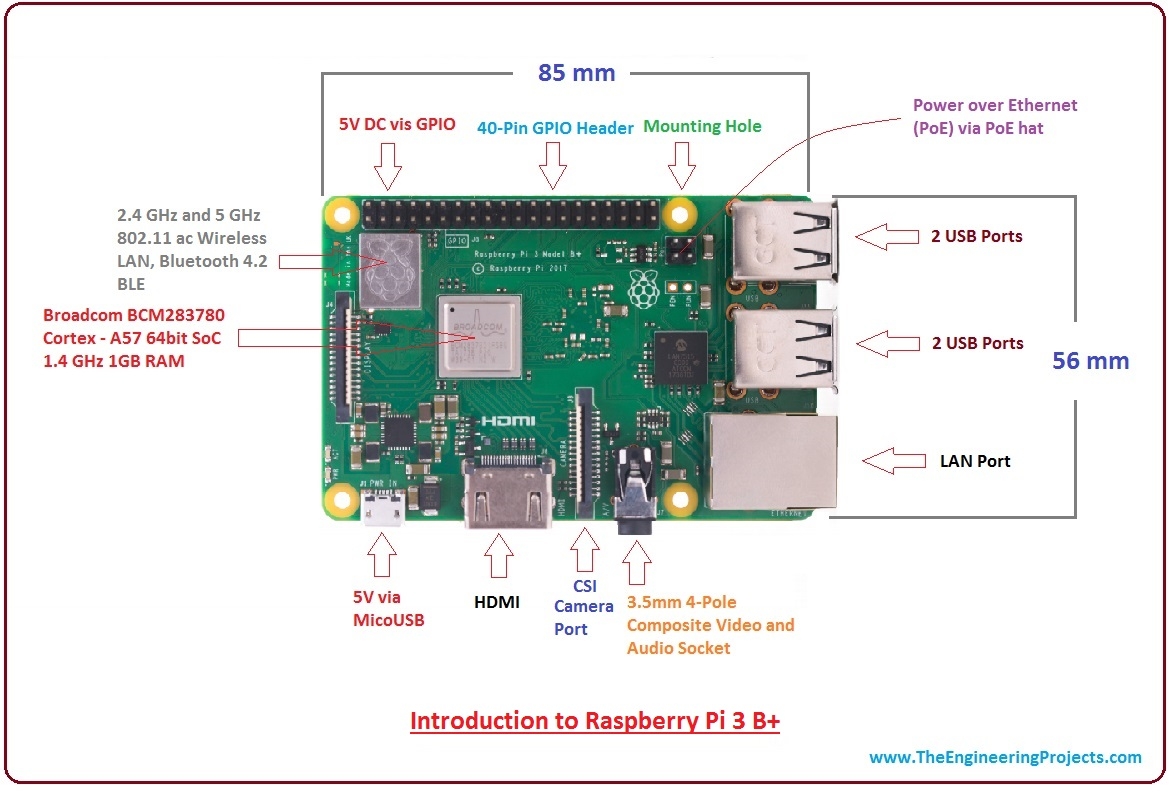
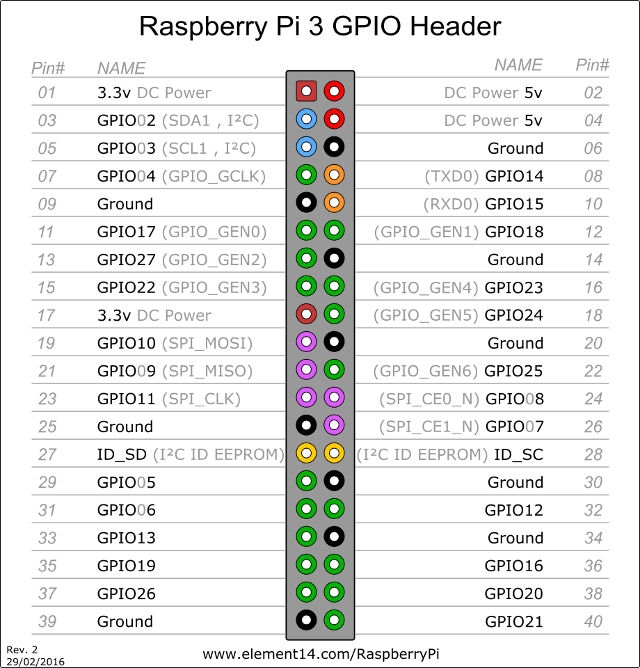
Pros:
- much more powerful: can do machine vision and video processing
- uses standard computer peripherals
- ethernet, wifi (on some models)
- standard form factor for board and IO pins
- a variety of hardware variations
- well supported with resources
Cons
- most complex to get started, requires an OS layer
- requires standard computer peripherals to program
- consumes the most power
- just overkill for many physical computing applications
- the most expensive (at full size)
- not 5v tolerant
Best for: all ages, extended to life-long learning experiences, applications that require its power and connectivity
Problem-driven processes
What do I use to?
output light (LED, Neopixel, Incandescent, EL wire)
receive input (buttons & switches, potentiometers, touch, keyboards)
display data (on connected PC, on LCD)
measure distance/obstacles (infrared, ultrasonic, Lidar-ish, magnetics)
move something external (motors, servos, solenoids)
power something at more than 5v (transistors, relays, controllers)
measure device orientation/movement (compass, gyro, accelerometers, IMUs, vibration, reed switches)
measure the environment (temp, humidity, moisture, pollutants, location & altitude)
communicate internally (serial, i2C, SPI, PWM, Neopixels, homebrew)
communicate externally (bluetooth, wifi, rfid, infrared, visible light)
What skills and tools will I need?
Critical basic electronics principles
positive is negative, now forget that.
my Aunt is from West/Virginia or what’s a watt?
Ohm’s Law: V = IR aka I = V/R, R = V/I. applications
logic levels
Learn how to read a datasheet, pinout map, and schematic.
Tie all grounds together, test everything, use pullups.
Tools
breadboarding and protoboarding gear
multimeters
power supplies
magnifying glass/magnifying cameras
oscilloscopes
wiring and soldering equipment
What do I do when I have a component with no info?
-
- find data sheet & schematic
- study power in & out, including per pin
- study data in & out
- look at physical mount and pins
- decipher extra components (reading SMD codes)
- study circuit board traces
- test with power supply and multimeter or oscilloscope
- test with development board
- watch for smoke
- find data sheet & schematic